Techniques
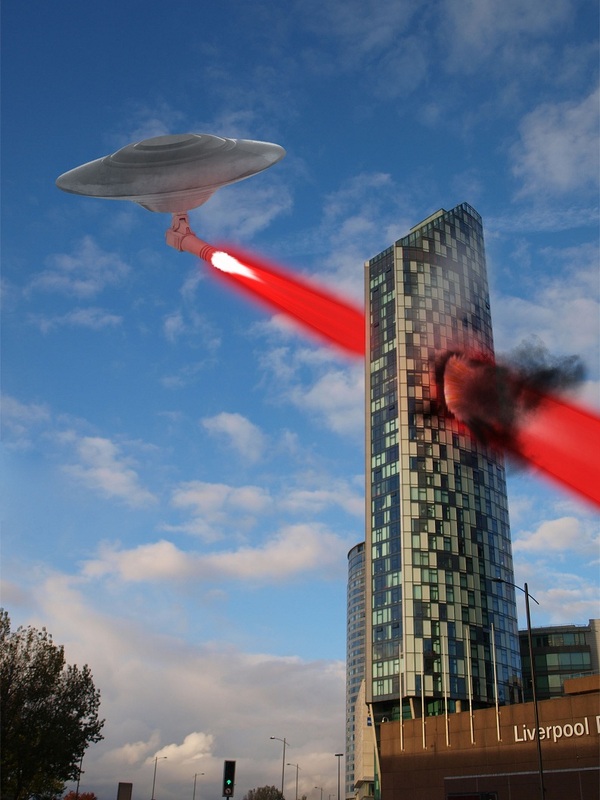
UFO
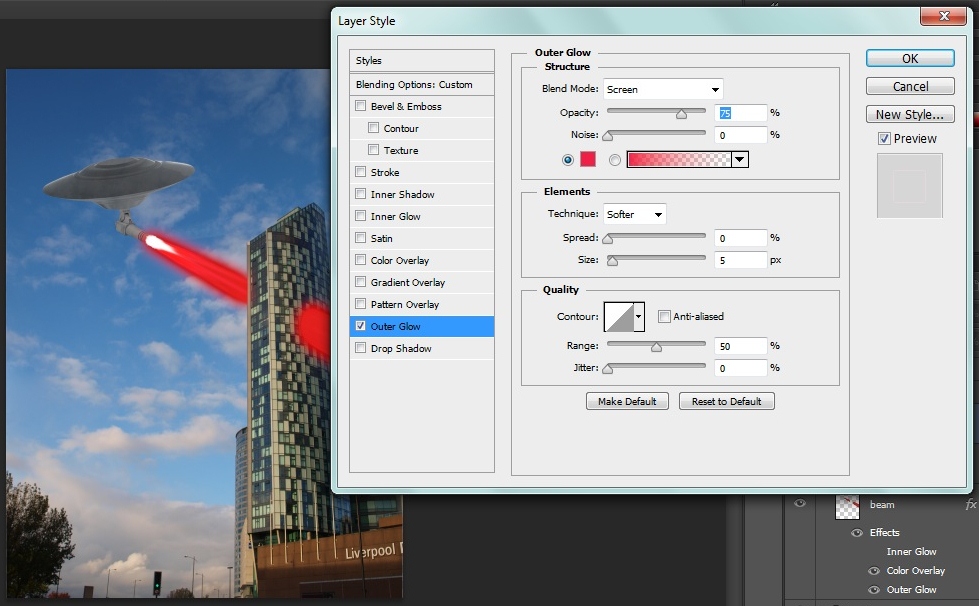
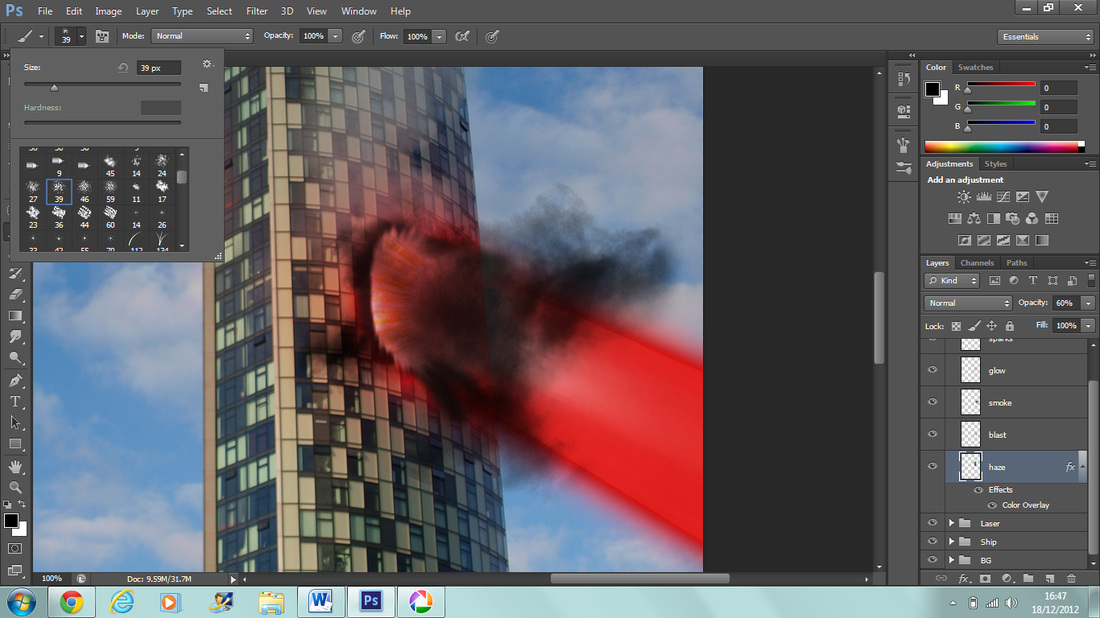
To create this image I firstly inserted a UFO stock image I found on Google, removing it from its background with the selection tool, I changed the brightness and contrast to match my city image in image>adjustments, then changing the size and angle by using the shortcut ctrl T. also doing the same with the gun stock image placing it under the UFO. Then I selected a soft round brush in the colour red and simply clicked it once at the end of a gun (with opacity at around 85%) then use the smudge tool to drag the paint down and create a light effect, then do this again with the colour white selected however not dragging it as long. Then using the square tool I created the shape of the laser beam by holding down ctrl when dragging the top and bottom right corners out and down once id drawn the square to make a wider end. I then used the lasso tool to select the beam on either side of the building, went to select>inverse>del to remove the middle of the laser where the building is , making sure that where the beam comes back out the building it was slightly rounded to make the angle right. I then filled it red by adding a solid colour in an adjustment layer. Then double clicking on the layer thumbnail and adding both outer and inner glows in red. I then used the same technique as the bright flash to add a reflection glow on to the ships gun, however with a much lower opacity and using the eraser to delete the reflection from around the gun making sure it’s in its own layer and that this is the right layer selected. Also doing the same around the whole where the laser comes back out the building. I then added some smoke, with a low opacity, in white using a smoke brush, making it point up as this is the direction it would be going. Also adding some black smoke pointing outwards from the hole, with a lower opacity but higher than the white smoke. To create the burnt hole effect I added a big black spot using the paint brush tool with round 82% opacity, then I selected the ’39 splatter brush’ and added some splats around the edges of the circle to make it less harsh. Then I copied the white flash laser from the gun and duplicated it on another layer using ctrl J this is to put on the black circle and I did this so it is all the same angle however I enlarged it using ctrl T again. To create the sparks I inserted lines and gave the inner and outer glows.
|

|
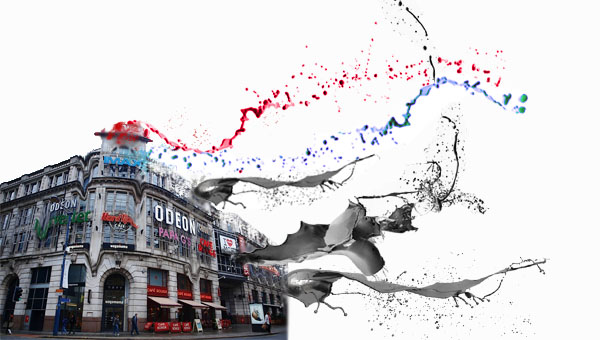
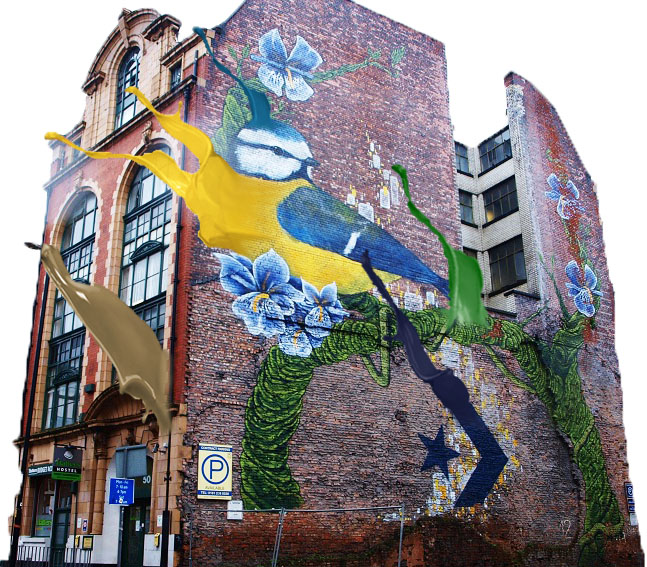
Melting
To create this melting/paint splat effect I inserted a paint splat stock image, then changed the saturation then hue to the splats starting point colour. I then went to filter>Distort>Liguify and used the point finger tool like a brush to drag down areas to create a melting effect.

Fireworks
Firework and sparkler light drawings!
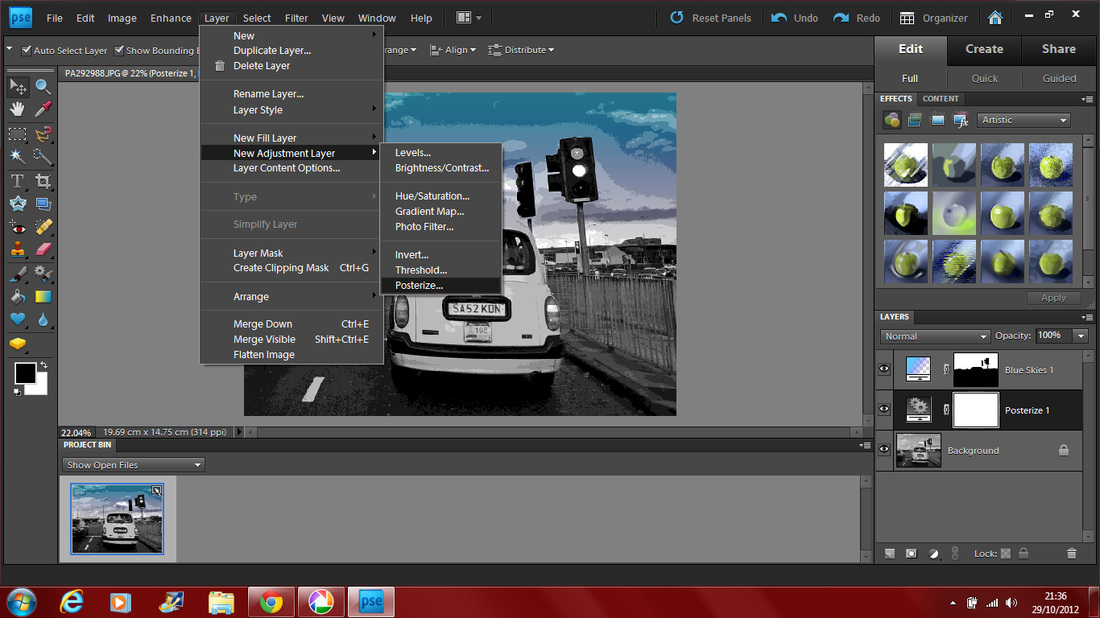
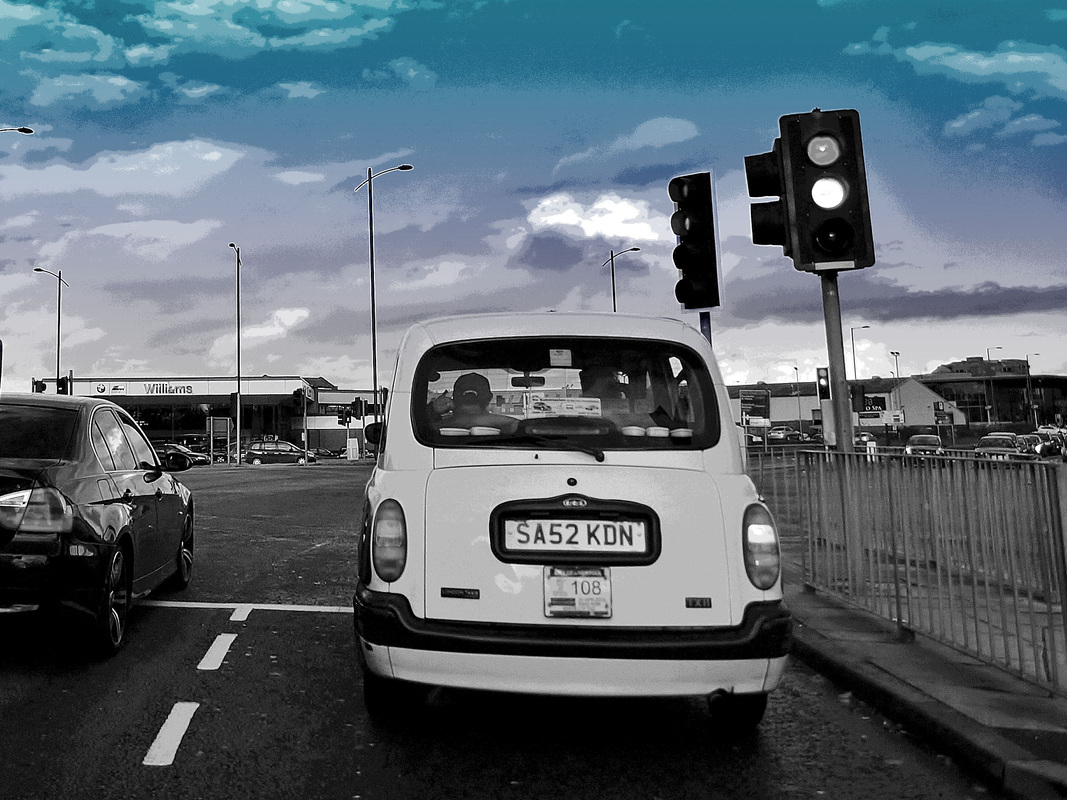
Posterized taxi!
To create the final image below, first i cropped my picture; that was taken in Liverpool. Then, i edited the contrast making it higher. Thirdly i changed the photo into black and white. Then i used the quick selection tool on Photoshop elements 9 to select all the same colour shade of grey in the sky, and added a light blue colour burn layer. I then went to layer>new adjustment layer> posterize, and this is where the image became unusual. This layer gave my image a water colour effect, also adding texture and movement in the clouds. Overall this image is now very different and distinctive.

|
|
Speckles;
Firstly, choose a picture. Remove it from its background and copy once into two different layers, put one slightly out of line of the original, and stretch one a lot further. Select the brush tool, set it to white and select the ‘spatter 59 pixels’ brush. Select the layer with the stretched image and make the other layers invisible. Use the brush all over the furthest away part of the image; however don’t drag the brush, just click repeatedly to use. Do this for the layer that is slightly out of place and you image should be done once you make all layers visible. I’m some cases you may need to use the brush on the original layer too. You can put the image on a background of leave it.

|

|
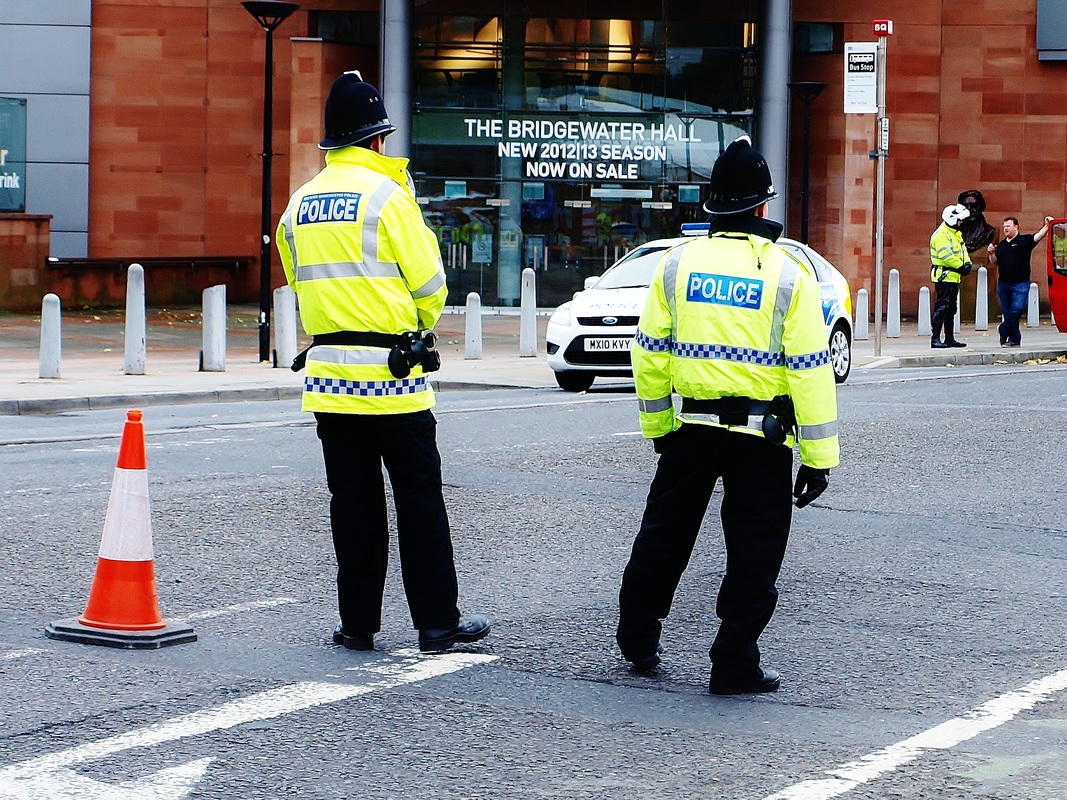
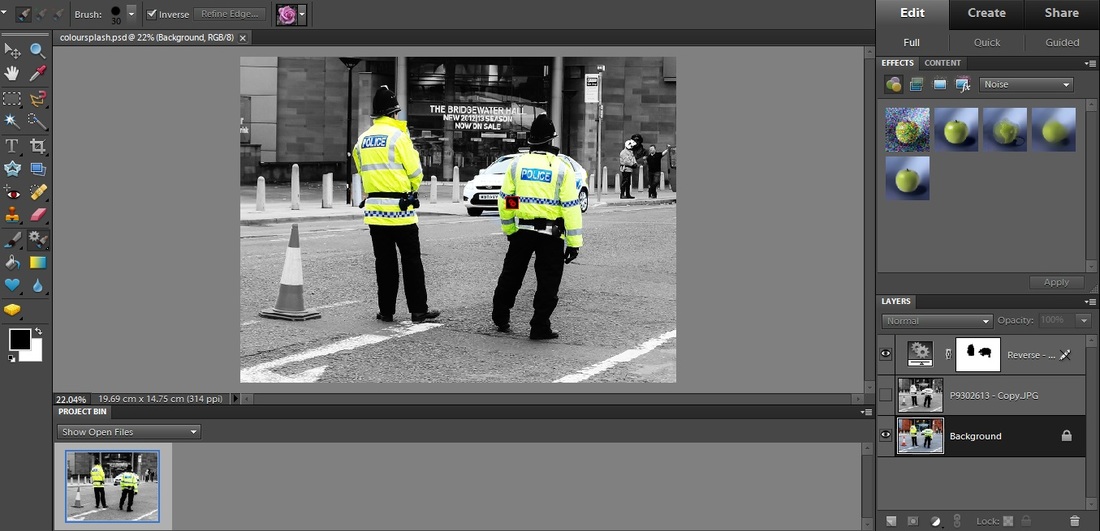
Colour splash;
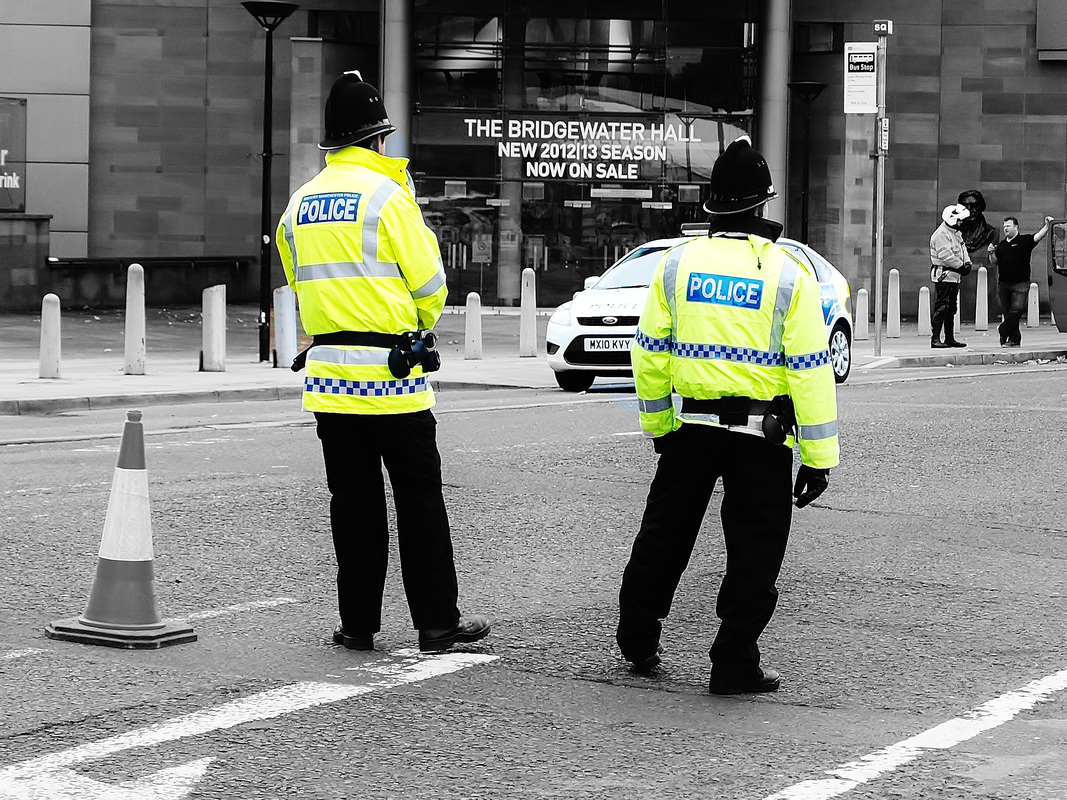
I took this photo in Manchester, and then edited it on Photoshop elements 9. Firstly I selected the Smart brush tool from the tool bar on the right, then ticked the inverse box and selected ‘reverse black and white’ this lets you select where you want to keep colour and makes the rest of the image black and white. To select where you want colour you use the quick selection tool which automatically turns on when you select ‘reverse black and white’ from the drop down menu.
|
|
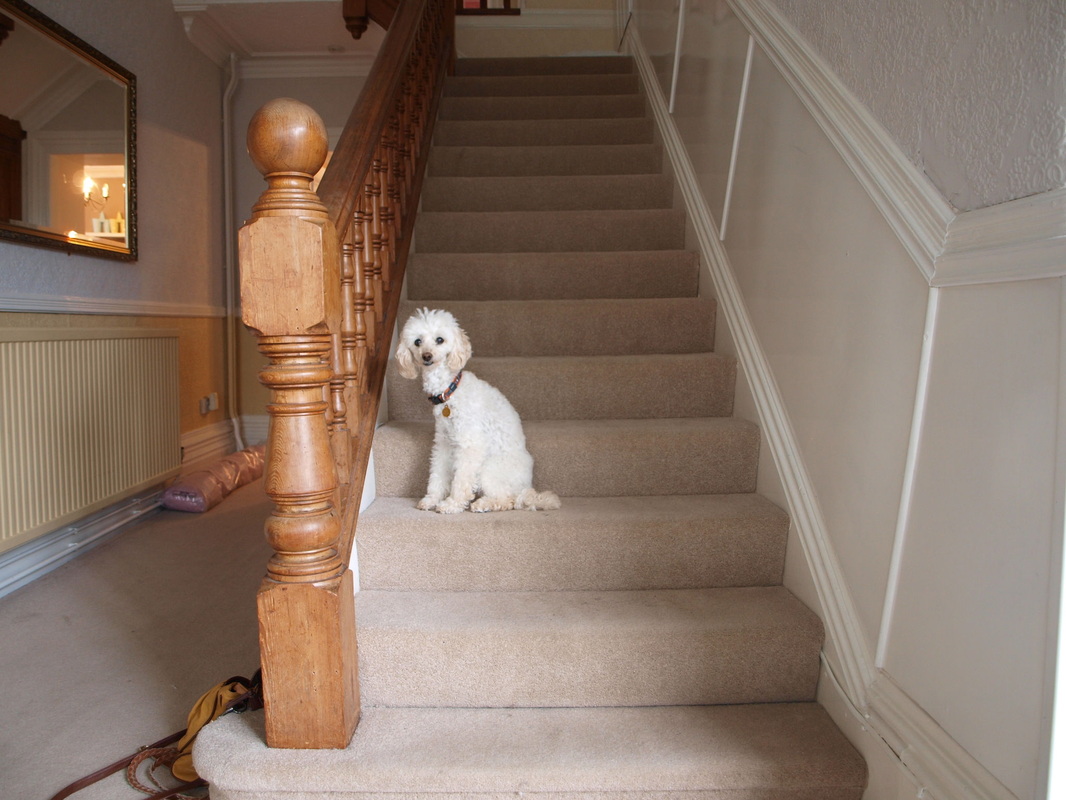
Composite images
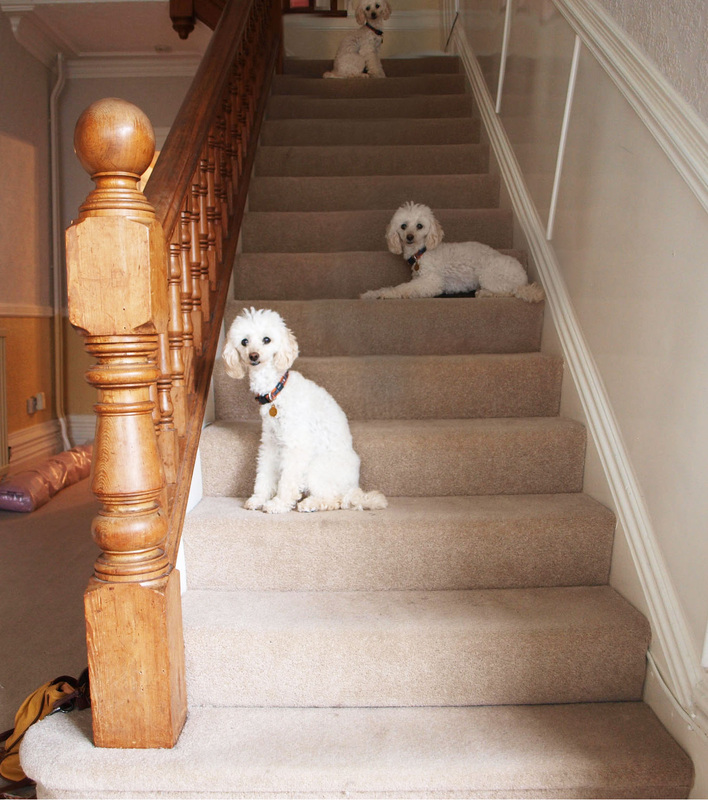
To create a composite image you first need to take 3 photos using a tripod, with out moving it. Using Photoshop, the first thing you need to do in drag your second image onto the first. This will be named as layer 2 Then using the layer mask tool, add a layer mask. The layer mask allows you to make parts if an image transparent so that you can see the image below. Choose black as your foreground colour, then choose a soft round paint brush and simply paint over where the main object below will be. this will work as long as you didn't move your tripod and your image line up correctly. Now, drag your third image onto your image named 'layer 2', add another layer mask then like earlier, choose black as your foreground colour, then choose a soft round brush. However before you begin to paint again you need to set the opacity to 100%; if you have a low opacity the image will be see threw(ghost like). Begin to paint over where the two images below will be. If you paint over a part of the image and it disappears to get it back, change the foreground colour to white an paint over, the image will once again be revealed.
|
|
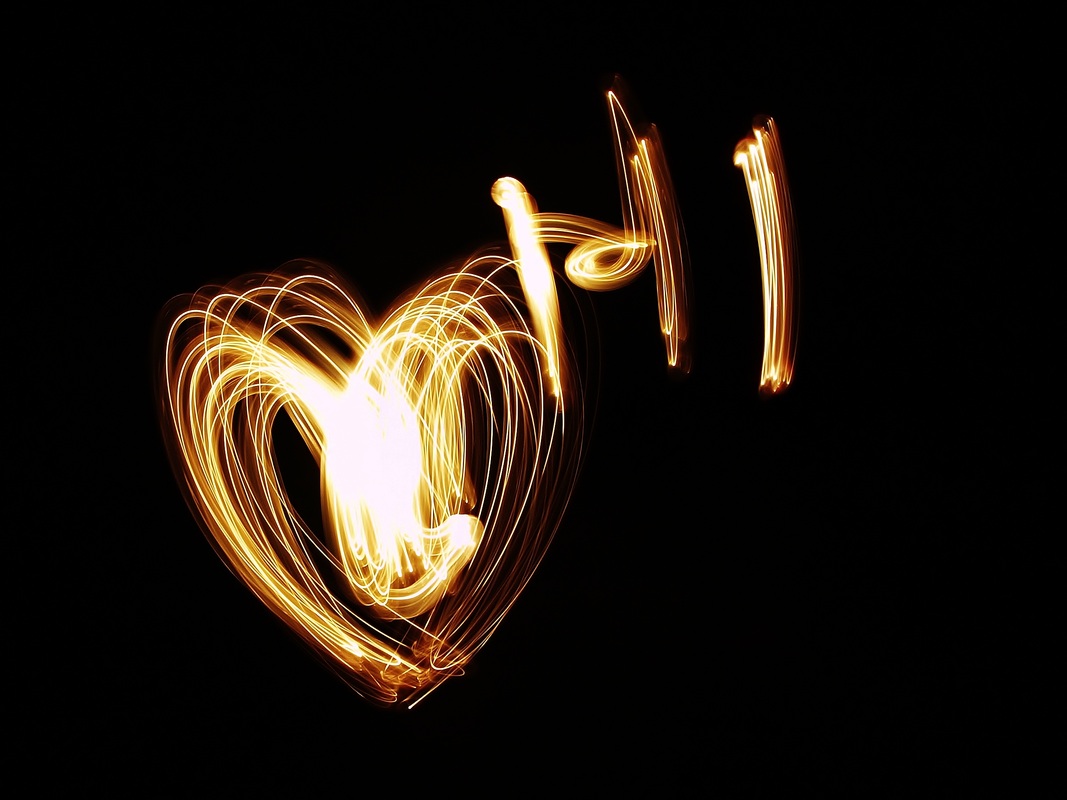
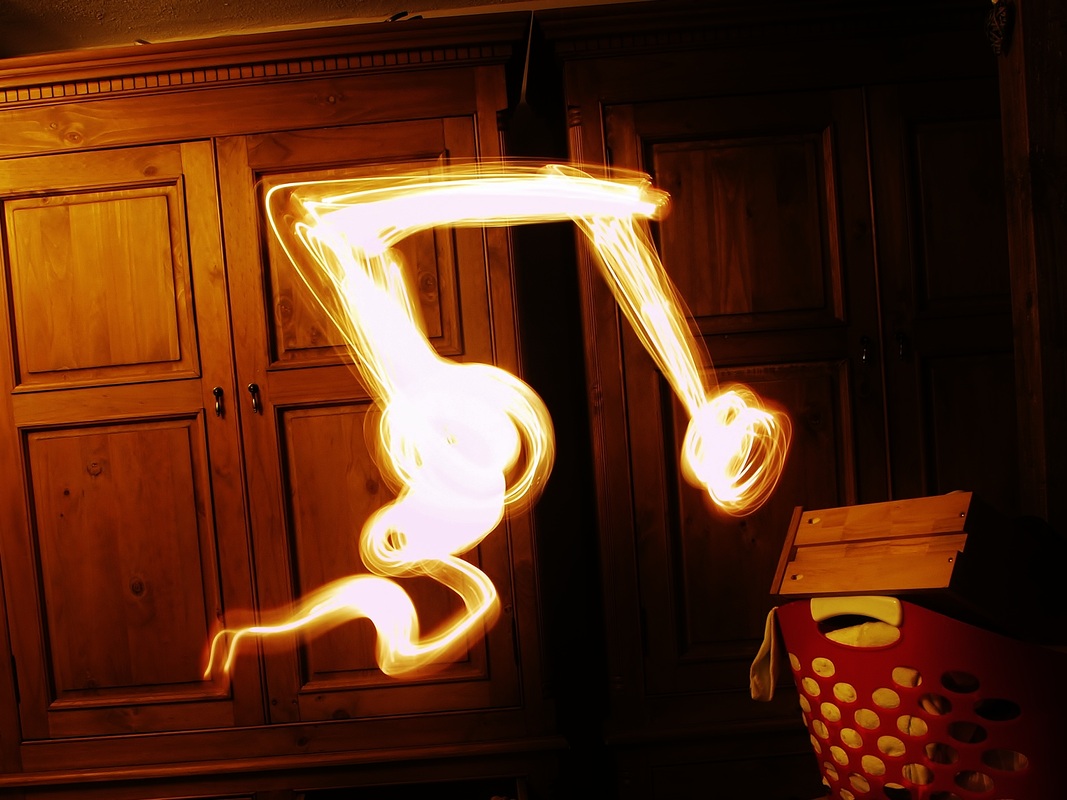
Light painting
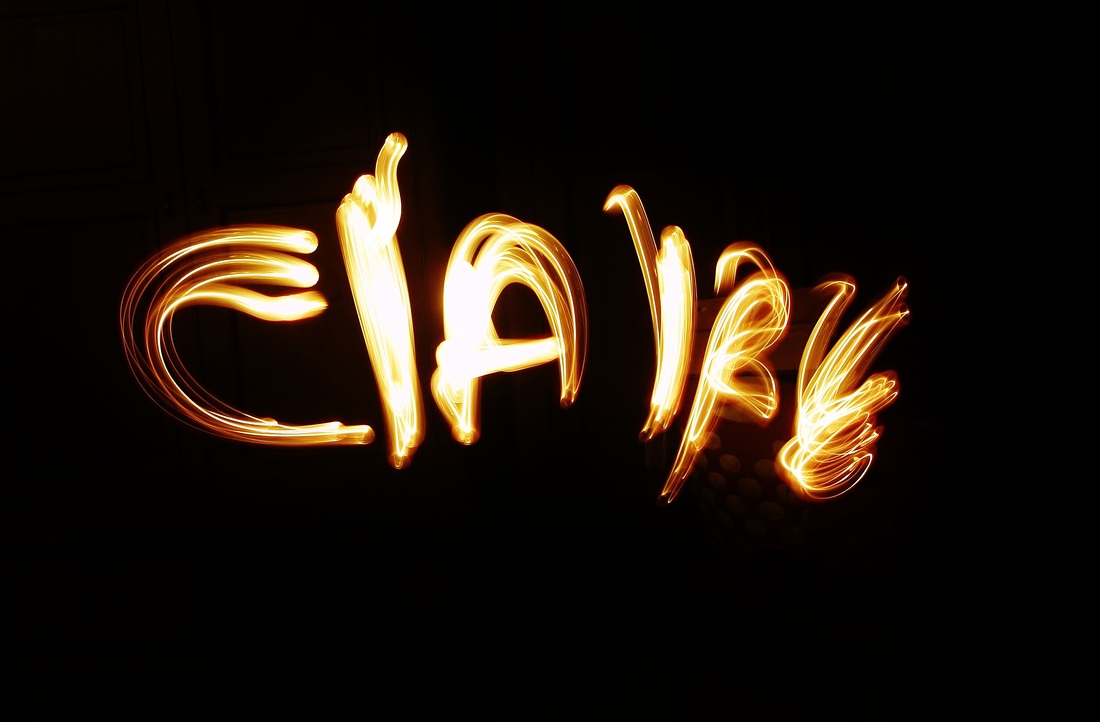
Light painting is a photographic technique in which exposures are made by moving a hand-held light. A variety of light sources can be used, ranging from simple torches to candles, matches, sparklers or lighters. Light painting requires a slow shutter speed, usually a second or more. Light painting usually looks like a quick sketch. A tripod is usually necessary due to the long exposure times other Alternatives, like a table. A remote or self-timer is generally necessary minimize camera shake. Light Painting Photography can be traced back to the year 1914 when Frank Gilbreth, along with his wife Lillian Moller Gilbreth, used small lights and the open shutter of a camera to track the motion of manufacturing and clerical workers. Man Ray, in his 1935 series "Space Writing," was the first known art photographer to use the technique and Barbara Morgan began making light paintings in 1940.
|
|


Macro Photography
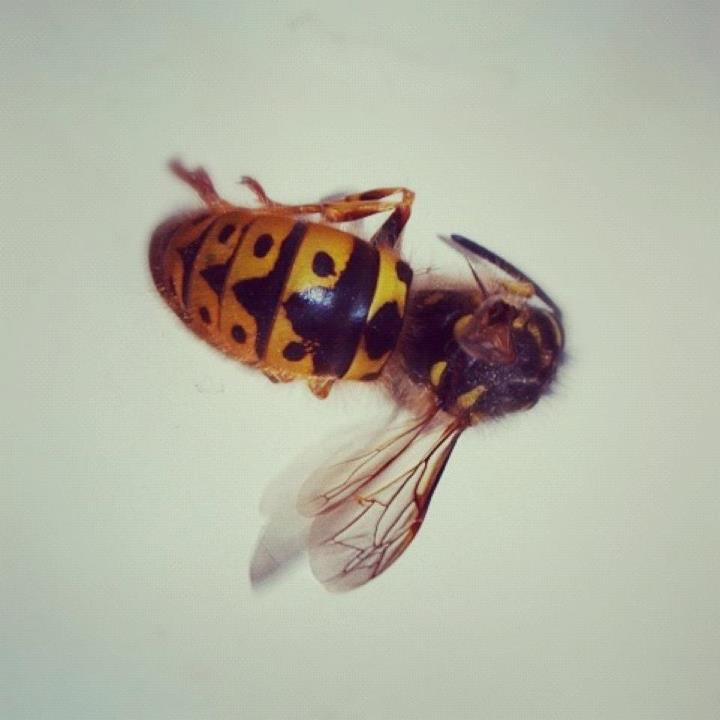
Macro photography is close up photography, usually of very small objects which shows great detail. Lots of interesting things to capture are insects, flowers, spider webs etc. items around the house can also be good to work with. You may or may not need to have the flash on; in some cases the flash may give too much shadow or make your photograph too bright if the camera is to close. To catch a good macro picture having your ISO at around 100, you aperture around f/11 - f/13 and your Shutter around 1/160th-1/200th should do this very well. Having a lower aperture will give great sharpness but not enough focus. Here is a photo of a wasp I took and you can see its unusual pattern and the detail in its wings.
Depth of field
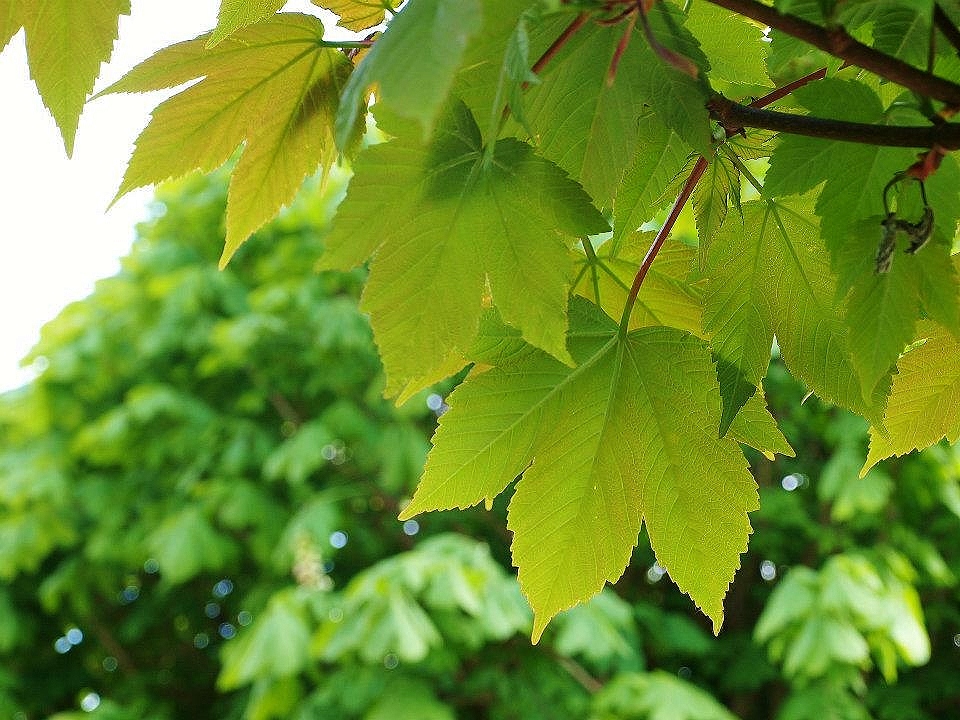
In film and photography depth of field is the distance between the nearest and farthest objects in a scene that appear reasonably sharp and focused in an image. it varies depending on the aperture. The depth of field does not suddenly change from sharp to unsharpened, but instead occurs as a gradual transition. Everything immediately in front of or in the background of the focused object begins to lose sharpness - even is this is not perceived by our eyes or by the resolution of the camera. This picture is my own and was taken on a tree near where I live in Llandudno.
