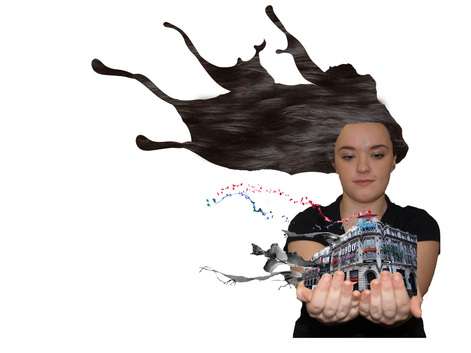
This image was created by applying the hair the same way as the previous image ( selecting it from an image taken and applying it behind the body image) however merging and blending it more into the original hair line to make it more realistic, to create the hair splats I used my 1st and 3rd technique from below and put them together. The splattered building is the same image used from my paint splatter technique however flipped over. To test out a different effect I turned the image partly black and white using the smart brush tool on photoshop with a reverse black and white effect on it.
I have discovered there are many ways in which i can create the image in the style i want to create. My first technique is to insert the splats just like on my paint splatter technique, i used the quick selection tool to just select the splat, used hue/saturation and contrast changes to make them the same brown as the models hair. i then defrindged the splats to make them neater and clearer.
Technique 1
Technique 2
My second technique is to save the first technique image twice and opening it again, however holding ctrl and clicking on the layer thumbnail to just select the splat alone, then selecting the stamp tool. to select to where i wanted to copy with the stamp i held alt and clicked the hair, i then brushed over the selected splat so it was filled with hair. As the splat is selected alone the stamp does not copy/paint out of the selection.
Technique 3
The third way i found to create the image is to use a splatter or/and a dirt brushes but as a rubber, this will erase in the shape of the brush to create a more shattered and broken effect.
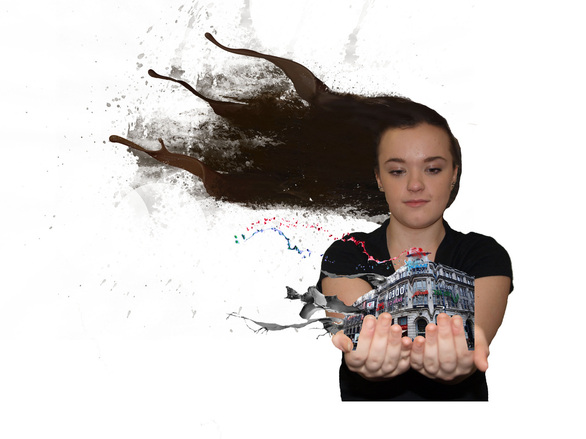
To create this image I took an image of my model sat straight with her hair tied up quite flat and tight, with her hands cupped out in front of her. I then took some shots of her hair down whilst she was lying on a high flat surface to capture her hair hanging. Using Photoshop I then inserted both images into but different windows. On the hair image I used the lasso tool to neatly select the hair. I then removed the background from the body image and inserted the hair, behind the head and rotated so it comes out to the left from the head. Using the smudging tool I then smudged the hair slightly into the hairline so that it blended in. As I wanted this image to contain lots of movement I used my printworks building paint splatter technique and inserted it into the hands. This is done by applying a layer mask, selecting the brush tool in black and rubbing through. After Experimenting with movement i now want to create even more. To do this i want to create an image like the one below, however with the hair also turning into splats. This will create movement, and also a surrealism piece.
To create this melting/paint splat effect I inserted a paint
splat stock image, then changed the saturation then hue to the splats starting
point colour. I then went to filter>Distort>Liguify and used the point
finger tool like a brush to drag down areas to create a melting effect.
Critical study
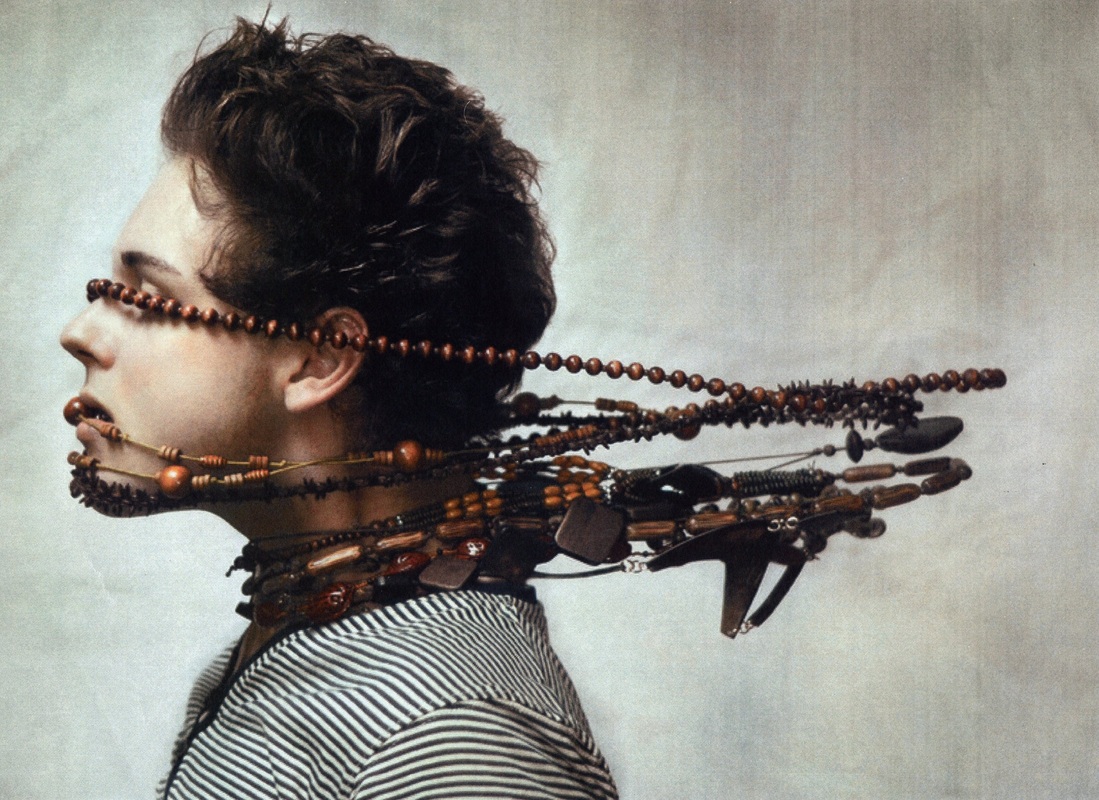
This image was taken by an unknown photographer and was found on Google images. It comes from the movement of surrealism because it’s almost supernatural the way the necklace looks like its pulling the man back. My first impression of this piece is that it’s very unique; I have never seen an image like this one before. The image may be about power, as the unknown force supposedly pulling the necklaces back must contain some power and strength.
This image would have been made by getting the model to lie on a flat high surface with their shoulders and upwards off the surface, then putting the necklaces in the wanted areas so then hang and capturing it. This makes the photo fairly easy to create however it is still an exceptional picture. I think it is the strain in the models neck from having to hold himself up which create the illusion that the necklaces are pulling him backwards when we first see the image.
In the Foreground the man is the main focal point, standing out from the pale grey background because there are no distractions at all from him. There are no shadows created on the image, only from the necklaces onto the man’s face but these do not play a role in the image. The man’s face is lit up well and this makes him clear to see, if he was not lit up the whole image would have been dull, grey and not very prominent.
When the image was still RAW the rule of thirds may have been used however I believe the images size has been cropped to only contain the man with some small space around him.
I think this piece is imaginative and as the image is so cropped down I think the photographer knew what he wanted to achieve and didn’t want us distracted from the main feature. The story behind the piece can be decided independently by each viewer but I think it reflects a mysterious supernatural theme which leads to me thinking maybe the photographer has an interest in that area or has even witnessed a super natural experience.
I choose to write about this image because it was unique and my thoughts about it have not changed. I like this work because it is so simple but yet very effective. I think to improve the image If the photographer had made the man’s expression different, maybe more shocked or hurt the image may be better, this is because if he is inexplicably being pulled back by beads he would do more than close his eyes, he would be very shocked or even scared.
From this piece I have learnt that to make a surrealist image, you do not have to use Photoshop or any other programme. Some images can be made and left RAW but make sure they are to a high quality and are unique.


 RSS Feed